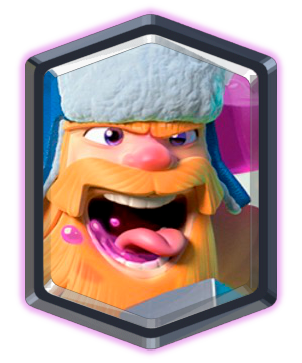
Lumberjack Strategy Guide: Master the Rage-Dropping Berserker
Complete Lumberjack strategy guide for Clash Royale. Learn LumberLoon tactics, Rage mechanics, optimal placement, synergies, and how to maximize this fast-paced Legendary card.
Introduction: The Fastest Berserker in the Arena
The Lumberjack is one of Clash Royale's most unique and versatile Legendary cards, combining incredible movement speed, high DPS, and the game-changing Rage spell upon death. This 4-elixir powerhouse rushes toward enemies at "Very Fast" speed, dealing massive single-target damage before dropping a Rage spell that amplifies your entire push.
What makes the Lumberjack special is his dual value proposition. While alive, he's a fast mini-tank that reaches towers quickly and melts defensive troops. When he dies, he drops a 2-elixir Rage spell for free, boosting all nearby friendly troops' attack speed and movement speed by 35%. This death Rage is what enables devastating combinations like LumberLoon that terrorize opponents.
However, Lumberjack requires precise timing and positioning. His moderate health makes him vulnerable to swarms and buildings. His melee range means air troops can kite him endlessly. His effectiveness depends on having follow-up troops ready to capitalize on the death Rage. Mastering these mechanics separates casual Lumberjack users from players who dominate with him.
Quick Stats Overview
- Elixir Cost: 4
- Rarity: Legendary
- Type: Ground Troop (Melee)
- Targets: Ground
- Speed: Very Fast
- Range: Melee (Short)
- Deploy Time: 1 second
- Death Effect: Rage spell (2 elixir value)
Understanding the Death Rage Mechanic
The Lumberjack's Rage drop is what makes him Legendary. Understanding this mechanic is crucial:
Rage Mechanics Breakdown
- ▸Auto-Drop: Rage spell drops instantly at Lumberjack's death location
- ▸Duration: 6 seconds (shorter than regular 8-second Rage spell)
- ▸Radius: 5 tiles - affects all friendly troops in area
- ▸Boost: 35% attack speed + 35% movement speed increase
- ▸Value: Effectively a free 2-elixir spell (Lumberjack is 4, mini-tank + Rage = 6 value)
Critical Insight: The death Rage is NOT optional - it always drops. Position Lumberjack's death location strategically so Rage benefits your troops, not empty space. This positioning skill separates masters from beginners.
Maximizing Rage Value
To extract maximum value from death Rage:
- Deploy support behind Lumberjack - Balloon, Hog Rider, or other troops follow him into the Rage
- Time the death - Position Lumberjack so he dies exactly when your main threat enters Rage radius
- Use defensively - Defensive Lumberjack death Rage boosts your counter-push troops instantly
- Tower Rage - If Lumberjack dies near tower, the tower gets Raged (+35% attack speed)
Card Stats and Combat Performance
At Tournament Standard (Level 11), Lumberjack's stats make him a glass cannon speedster:
- Hitpoints: 1,060 HP - Moderate health, similar to Knight
- Damage: 200 per hit - Very high single-target damage
- DPS: 285 - One of the highest melee DPS in the game
- Hit Speed: 0.7 seconds - Extremely fast attack speed
- Movement Speed: Very Fast - Same as Hog Rider
What Lumberjack Destroys Quickly
High-Value Eliminations
- • Musketeer: Dies in ~3 hits (2.1 seconds)
- • Wizard: Eliminated before dealing significant damage
- • Electro Wizard: Killed before second stun
- • Ice Wizard: Destroyed quickly despite freezing
- • Witch: Melts before spawning multiple skeleton waves
- • Buildings: Tesla, Cannon destroyed in seconds
Lumberjack's insane DPS makes him perfect for eliminating support troops and buildings
The Legendary LumberLoon Combo
The most famous Lumberjack strategy deserves its own section:
How LumberLoon Works
Deploy Lumberjack at bridge, immediately followed by Balloon. Lumberjack rushes ahead, destroys defensive buildings/troops, then dies and drops Rage. Balloon flies into the Rage, getting +35% attack speed and movement speed. The Raged Balloon reaches tower faster and deals devastating rapid-fire bomb damage.
Perfect LumberLoon Execution
- 1. Lumberjack at bridge - Deploy when opponent is low on elixir or just overcommitted
- 2. Balloon immediately behind - 0.5-1 second delay, positioned to fly into where Lumberjack will die
- 3. Spell ready - Hold Zap/Arrows for their swarm counter (Minion Horde, Bats)
- 4. Prediction Freeze (optional) - Advanced play: Freeze as Balloon enters tower range
LumberLoon Deck Example
Average Cost: 3.4 - Fast cycle allowing multiple LumberLoon attempts per game
Optimal Placement Strategies
Offensive Placements
1. Bridge Rush (Pressure Play)
Deploy Lumberjack directly at bridge when opponent is low on elixir or after they commit heavily opposite lane. His Very Fast speed catches them off-guard. Works best in double elixir when you can immediately follow with Balloon or other troops.
Best used when: Opponent spent 7+ elixir, they just deployed pump, or you're making desperate overtime push
2. Behind Tank (Beatdown Support)
Deploy Lumberjack behind Giant, Golem, or Lava Hound. Tank absorbs damage while Lumberjack demolishes defenders. When Lumberjack dies, Rage boosts the tank and any remaining support troops. Devastating in double elixir.
3. Opposite Lane Punish
When opponent commits 8+ elixir to one lane, immediately Lumberjack rush opposite lane. Forces them to split elixir or sacrifice tower. Even if Lumberjack dies, Rage helps counter-defend their original push.
Defensive Placements
- Anti-support: Drop Lumberjack on enemy support troops (Wizard, Witch, Musketeer) to instantly eliminate them
- Tank killer: Use against Giant, Royal Giant, or Golem - high DPS shreds tanks quickly
- Building destroyer: Lumberjack melts X-Bow, Mortar, and Elixir Collectors in seconds
- Counter-push setup: Defend with Lumberjack, use death Rage to boost counter-push troops
💡 Pro Tip: When defending with Lumberjack, position him so death Rage falls on your tower. Raged tower melts remaining enemy troops and boosts your counter-push.
Best Synergies and Combinations
Win Condition Pairings
Lumberjack + Balloon (LumberLoon)
The gold standard. Lumberjack clears path, dies, Balloon flies through Rage dealing massive damage. Add Freeze for virtually guaranteed tower destruction. Works at all trophy ranges.
Lumberjack + Hog Rider
Both Very Fast troops rush together. Lumberjack destroys buildings while Hog targets tower. Death Rage speeds up Hog's attacks on tower. Difficult to defend against dual fast threats.
Lumberjack + Ram Rider
Similar concept - Lumberjack clears defenders, Ram Rider charges through with Rage boost. Ram Rider's snare effect + Raged attack speed = unstoppable pressure.
Lumberjack + Golem
Beatdown powerhouse. Golem tanks while Lumberjack destroys support. When Lumberjack dies, Rage amplifies Golem, Night Witch, and Golemites. Nearly impossible to defend without multiple spells.
Support Card Synergies
- Freeze: LumberLoon + Freeze = guaranteed tower damage. Freeze after Lumberjack dies for maximum effect
- Zap/Arrows: Clear Minion Horde, Bats, or Skeleton Army that counter Lumberjack
- Tornado: Pull defenders into Lumberjack's melee range for instant elimination
- Clone: Cloning a Raged Balloon or Raged troops creates overwhelming damage
- Mega Minion: Air support protects Lumberjack from air troops, benefits from Rage
- Guards: Shield troops distract while Lumberjack deals damage
Countering Lumberjack and Counter-Playing
Common Lumberjack Counters
- Skeleton Army: Surrounds and melts Lumberjack before he reaches target (counter: predict with Zap/Log)
- Goblin Gang: Similar to Skarmy, swarms and destroys him (counter: arrows or splash support)
- Buildings: Cannon, Tesla, Tombstone distract Lumberjack away from tower (counter: spell the building)
- Air troops: Minions, Mega Minion can kite Lumberjack endlessly (counter: add air support like Mega Minion)
- Mini P.E.K.K.A: Out-damages Lumberjack in direct fight (counter: surround with swarms)
- Valkyrie: Splash damage + high HP counters Lumberjack (counter: air support or kiting)
- Ice Spirit + Skeletons: Cheap distraction that wastes Lumberjack (counter: prediction spell)
Overcoming Counters
Key Strategy: Never send Lumberjack alone unless punishing. Always have spell ready for swarms or support troops ready to clear air/buildings. The death Rage must benefit follow-up troops.
Against Swarms
- Hold Zap, Log, or Arrows until swarm deploys
- Use prediction spells if opponent always plays swarm same location
- Add Baby Dragon or Wizard ahead of Lumberjack for preemptive clearing
- Deploy Guards or Valkyrie to tank swarm damage
Against Buildings
- Spell the building (Fireball Tesla, Lightning Inferno Tower)
- Let Lumberjack destroy building while Balloon/Hog continues to tower
- Pressure opposite lane to force awkward defensive splits
- Use Tornado to pull building-targeting troops away from building
Against Air Kiting
- Always bring air support in Lumberjack decks (Mega Minion, Baby Dragon)
- Use Tornado to pull air troops into tower range
- Deploy Lumberjack behind tanks so air troops must target tank first
- Accept that air kiting happens - use Lumberjack defensively in these matchups
Advanced Lumberjack Techniques
The Rage Positioning
Advanced players position Lumberjack to die in specific locations for optimal Rage placement. For LumberLoon, deploy Lumberjack 1-2 tiles from bridge so he dies mid-lane, creating Rage zone that Balloon flies through AND covers tower. This ensures maximum Rage uptime on Balloon's tower attacks.
Defensive Rage Conversion
Use Lumberjack to defend, positioning him so death Rage falls on your counter-push troops. For example, Lumberjack kills their push, dies, Rages your Hog Rider who rushes opposite lane with speed boost. Turns defense into instant offense.
The Triple Threat
In double elixir, deploy Lumberjack, Balloon, and third win condition (Hog Rider, Ram Rider) simultaneously in different lanes. Opponent must choose: stop LumberLoon or stop Hog. Either way, something connects. Extremely expensive (13+ elixir) but game-winning.
Tower Rage Exploitation
When defending, position Lumberjack to die next to your Princess Tower. Raged tower gets +35% attack speed, melting remaining enemy troops. This defensive Rage can stop 10+ elixir pushes while setting up devastating counter-pushes.
💡 Pro Tip: In overtime, Lumberjack's Rage enables two-tower threats. Drop LumberLoon on one tower, if defended, immediately Hog/Ram opposite tower using cycling Rage boost.
Matchup-Specific Strategies
Vs. Bait Decks (Moderate Difficulty)
Bait decks have Skeleton Army and Goblin Gang that destroy Lumberjack. Hold both spells for their swarms. Use Lumberjack to kill their Princess and Goblin Barrel. Never commit Lumberjack + Balloon without spell backup.
Vs. Beatdown (Lumberjack Excels)
Use Lumberjack defensively to kill their support (Night Witch, Wizard, Witch). His high DPS shreds tanks surprisingly fast. Death Rage boosts your defensive troops, creating instant counter-pushes. Opposite lane pressure with Lumberjack while defending their tank.
Vs. Cycle Decks (Use Carefully)
Cycle decks can cheaply counter Lumberjack with buildings and kiting. Don't overcommit. Use Lumberjack for defense and chip damage. In double elixir, overwhelm with LumberLoon when they're low on cycle counters.
Vs. Air Decks (Challenging)
Lumberjack can't hit air, making air-heavy decks problematic. Use him defensively to kill ground troops. Bring dedicated air defense (Mega Minion, Musketeer). Focus on defending their air pushes, then counter-push ground when they're cycling.
Common Mistakes to Avoid
- ✗Playing Lumberjack without spell: Always have Zap/Arrows ready. Swarms instantly shut down Lumberjack without spell protection.
- ✗Wasting death Rage on empty space: Position Lumberjack so Rage benefits troops or towers. Death Rage is half his value.
- ✗Solo Lumberjack at full health enemy: Solo Lumberjack rarely takes towers. Always follow with Balloon, Hog, or other threats.
- ✗Ignoring air counters: Lumberjack decks MUST have air defense. Minions kite him endlessly otherwise.
- ✗Predictable LumberLoon timing: Vary your timing. Always at bridge = easy counter. Mix up placements and timing.
Level Considerations
Legendary Leveling
- • Legendary cards are hardest to level (trade tokens essential)
- • Lumberjack's damage breakpoints matter (one-shot interactions change with levels)
- • Death Rage stays consistent - doesn't scale with levels
- • Under-leveled Lumberjack struggles against over-leveled swarms
- • Level 11+ recommended for competitive ladder play
Upgrade priority: VERY HIGH if main deck. Lumberjack's DPS and survivability scale significantly with levels.
Conclusion: The Rage-Fueled Speedster
The Lumberjack embodies fast-paced, high-octane Clash Royale gameplay. His incredible speed, devastating DPS, and game-changing death Rage create unique strategic opportunities no other card offers. When played with precision and proper support, Lumberjack transforms from a simple melee troop into a win condition enabler that opponents struggle to counter.
Mastering Lumberjack means understanding death Rage positioning, timing your pushes perfectly, and always having spell backup ready. It means recognizing when to play aggressively versus defensively, varying your placements to stay unpredictable, and capitalizing on opponent mistakes with lightning-fast punishes. It means converting every successful defense into a Rage-boosted counter-push.
Whether you're running the famous LumberLoon, aggressive bridge spam, or heavy beatdown, Lumberjack provides explosive offensive potential and defensive versatility. Start implementing these strategies today - practice Rage positioning, master the LumberLoon timing, and develop the split-second decision making that separates good Lumberjack players from legendary ones. With the right technique, this 4-elixir berserker becomes your most feared weapon.
Ready to Master the Rage?
Use our AI Deck Creator to build optimized Lumberjack decks including LumberLoon variations. Or test your current deck with our Deck Reviewer to perfect your Lumberjack synergies and Rage positioning strategies.
Ready to Build Your Perfect Deck?
Use our AI-powered Deck Creator to generate optimized decks based on the strategies you just learned.