Golem Beatdown Complete Guide 2025: Unstoppable Tank Pushes
Master Golem beatdown with devastating tank pushes. Complete guide to building unstoppable attacks, support troops, spell timing, and matchup strategies for 2025 meta.
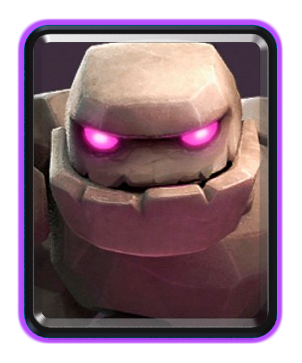
The Golem: Ultimate Ground Beatdown Tank
The Golem represents pure beatdown philosophy: invest massive elixir into an unstoppable push that overwhelms opponents through sheer force. As the highest health unit in Clash Royale, the Golem serves as an indestructible wall protecting your damage dealers. When played correctly, Golem pushes feel inevitable—opponents watch helplessly as your army marches toward their King Tower, unable to stop the beatdown juggernaut.
Unlike faster win conditions that chip away at towers, Golem decks commit to massive, game-ending pushes. You'll spend 20+ elixir building an army behind your Golem, creating pushes that destroy entire tower lanes in single assaults. This high-risk, high-reward playstyle requires patience, elixir management mastery, and understanding when to unleash your devastating attacks.
Why Golem Dominates Beatdown
Golem decks have maintained competitive viability since Clash Royale's early days through fundamental strengths:
- ▸Massive health pool - 3,400+ HP at max level makes Golem nearly impossible to kill quickly
- ▸Death damage - Golem explodes on death, damaging nearby troops and towers
- ▸Golemite spawn - Splits into two Golemites that continue tanking and dealing death damage
- ▸Building targeting - Walks straight toward towers, ignoring all distractions
- ▸Perfect support synergy - Night Witch, Baby Dragon, and Lightning create devastating combinations
- ▸Double elixir dominance - Unlimited elixir enables constant Golem pushes opponents cannot match
Golem Statistics
- • Elixir Cost: 8
- • Movement Speed: Slow
- • Targets: Buildings
- • Type: Ground Tank
- • Death Spawn: 2 Golemites
- • Rarity: Epic
- • Hit Points: 3,400+ (max level)
Classic Golem Beatdown: The Night Witch Synergy
The classic Golem Night Witch deck has dominated competitive play and ladder for years. This combination creates unstoppable pushes through perfect synergy between tanking and spawning.
Deck Composition
Primary tank win condition
Spawner and tank support
Splash damage air support
Heavy spell for defenders
Fast DPS and rage drop
Defensive grouping and activation
Reset and small spell
Air defense and tank killer
Average Elixir Cost: 4.3 - High cost demands precise timing
Core Strategy: Build and Destroy
Golem beatdown follows a simple but effective pattern: defend efficiently in single elixir, then build massive pushes in double elixir. Your entire strategy revolves around reaching double elixir with tower health intact and elixir advantage established.
Phase 1: Early Game Defense (0:00 - 2:00)
Objective: Defend with minimal elixir investment and scout opponent's deck
- • NEVER deploy Golem in first minute unless you have 10 elixir and opponent just committed heavily
- • Defend with Mega Minion, Baby Dragon, and Tornado to save elixir
- • Place Golem behind King Tower only if you're at max elixir (10) and opponent is low
- • Use Tornado to activate King Tower when possible for defensive advantage
- • Identify opponent's main win condition and counters
Phase 2: Mid Game Setup (2:00 - 1:00)
Objective: Build small Golem pushes and test opponent's defenses
- • Deploy Golem behind King Tower when approaching 10 elixir
- • Add Night Witch behind Golem as he walks forward
- • Support with Baby Dragon for splash damage
- • Save Lightning for when Golem reaches tower or faces grouped defenders
- • Note which troops opponent uses to defend—prepare Lightning for them next push
Phase 3: Double Elixir Dominance (1:00 - 0:00)
Objective: Unleash unstoppable 20+ elixir pushes that destroy towers
- • Deploy Golem immediately after previous push completes
- • Add Night Witch, Baby Dragon, Lumberjack behind Golem
- • Lightning grouped defenders (Inferno Tower + support troops) before Golem reaches them
- • When Golem reaches tower, deploy another Golem behind to maintain pressure
- • Lumberjack rage on death accelerates your entire push—overwhelming opponents
The Night Witch Synergy
Night Witch transforms Golem from strong tank to unstoppable force. She continuously spawns Bats (every 5 seconds) that swarm defenders and chip towers. Behind a Golem, Night Witch becomes invincible—opponents must kill the Golem first, giving Night Witch 20+ seconds of free Bat spawning.
When Golem dies, the 2 Golemites continue tanking for Night Witch. By this point, you have: 2 Golemites, Night Witch, 8-12 Bats, Baby Dragon, and potentially Lumberjack rage all attacking the tower simultaneously. This overwhelming swarm destroys towers in seconds.
Pro Tip: Always place Night Witch directly behind Golem (1-2 tiles). This ensures Golem absorbs all damage while Night Witch spawns Bats and deals damage safely. Placing her too far back delays her damage output.
Golem Clone: Maximum Chaos
For players who love explosive, game-ending pushes, Golem Clone doubles everything for overwhelming pressure:
Deck Composition
- Golem (8) - Primary tank
- Clone (3) - Doubles the push
- Night Witch (4) - Spawner support
- Baby Dragon (4) - Splash damage
- Lumberjack (4) - DPS and rage
- Tornado (3) - Defense and grouping
- Lightning (6) - Heavy spell
- Arrows (3) - Light spell
Average Elixir: 4.4
Clone Timing for Maximum Impact
Wait until your Golem reaches the tower with Night Witch, Baby Dragon, and Lumberjack behind him. As Golem starts attacking the tower, deploy Clone to duplicate the entire push. You now have:
- 2 Golems attacking the tower
- 2 Night Witches spawning Bats (12-20 Bats total)
- 2 Baby Dragons dealing splash damage
- 2 Lumberjacks providing double rage on death
When both Golems die, you have 4 Golemites. This army of 20+ units destroys towers instantly. The downside: cloned troops die in one hit. Opponents with Arrows or Fireball ready eliminate your cloned push, wasting 3 elixir. Only Clone when opponent lacks area damage spells in cycle.
Golem Beatdown with Tornado Synergy
Tornado elevates Golem decks from strong to elite through defensive mastery and King Tower activation:
Tornado Defensive Techniques
King Tower Activation: Against Hog Rider, place Tornado on your side of the river to pull him toward your King Tower. The King Tower activates and helps defend for the rest of the match—a massive defensive advantage.
Grouping for Lightning: When opponent deploys multiple troops to defend your Golem, Tornado pulls them together for a devastating Lightning strike. This 9-elixir combo (Tornado 3 + Lightning 6) often destroys 12+ elixir of defenders, creating unstoppable pushes.
Kiting to Center: Pull ground troops to the center of your arena where both Princess Towers damage them. This maximizes tower DPS and minimizes damage taken.
Lightning Spell Mastery
Lightning defines Golem deck success. This 6-elixir spell eliminates buildings and grouped defenders that would otherwise stop your push. Master these Lightning targets:
- Inferno Tower + Support - Destroys the building that counters Golem plus supporting troops
- Three Musketeers - Eliminates all three for a massive positive trade
- Sparky + Tower - Resets Sparky and deals tower damage simultaneously
- Wizard + Musketeer - Clears medium-health defenders in one cast
- Tower + Elixir Collector - Destroys their elixir generation while chipping tower
Advanced Technique: Predict opponent's defensive troop placement and pre-Lightning that location as your Golem approaches. If timed perfectly, your Lightning destroys defenders as they spawn, leaving Golem unopposed.
Matchup Guide: Winning and Difficult Matchups
Favorable Matchups
Hog Cycle and Fast Cycle Decks
Win Rate: 70-80%
Cycle decks lack the defensive power to stop massive Golem pushes. Their strategy relies on chipping towers faster than you can build pushes—but one successful Golem push destroys their tower instantly.
Strategy: Activate King Tower with Tornado against Hog Rider for superior defense. Defend their chip damage with Mega Minion and Baby Dragon. In double elixir, your Golem pushes overrun their cycle defense. They cannot kill Golem fast enough.
Spell Bait Decks
Win Rate: 65-75%
Bait decks try forcing bad spell trades, but Golem decks have enough spell coverage (Lightning, Zap, Arrows) to handle swarms while maintaining offensive pressure.
Strategy: Use Zap for Goblin Barrel and small swarms. Save Lightning for Inferno Tower if they have it. Baby Dragon handles Goblin Gang and Skeleton Army. Once you build your Golem push, their swarm troops cannot stop your combined army.
Difficult Matchups
P.E.K.K.A Bridge Spam
Win Rate: 30-40%
P.E.K.K.A destroys Golem in seconds while their bridge spam punishes your heavy elixir investment. This matchup requires perfect defense and opportunistic offense.
Strategy: Defend their bridge spam with Mega Minion and Baby Dragon. Use Tornado to group their troops for splash damage. Only deploy Golem when you have 10 elixir AND they just spent 8+ elixir on offense. Consider defensive Golem placements to tank P.E.K.K.A while your towers damage her.
Inferno Dragon/Tower Control
Win Rate: 35-45%
Inferno-based defenses melt Golem before he crosses the bridge. Their high single-target DPS hard-counters your tank strategy.
Strategy: Lightning is your answer. When Golem approaches Inferno Tower, Lightning it before it reaches max charge. Against Inferno Dragon, use Zap to reset the beam, then Lightning when opportunity arises. Deploy Bats/Night Witch to distract Inferno Dragon's targeting.
Even Matchups
Mirror Golem Decks, Giant Decks, Lava Hound Decks: These matchups become races—who builds the better push first. Focus on defending their push efficiently, then counter-pushing with surviving troops plus Golem. Player skill and card levels determine winners.
Advanced Golem Techniques
Opposite Lane Pressure
When opponent commits 15+ elixir defending your Golem push in one lane, deploy fast troops (Lumberjack, Mega Minion) in the opposite lane. They lack elixir to defend both lanes, guaranteeing damage on at least one tower. This technique excels in double elixir when elixir regenerates quickly.
Golem First Play
Advanced players deploy Golem as the opening move behind King Tower. This aggressive play signals: "I'm building a massive push, stop me or lose." It works because:
- Golem takes 20+ seconds walking to the bridge—you regenerate 7+ elixir during this time
- Opponents who pressure opposite lane force you to defend, but you still have Golem push building
- Psychological pressure: opponents panic and overcommit counters
Only use this if you have 10 elixir and a strong defensive hand (Mega Minion, Tornado ready).
Lumberjack Rage Timing
Lumberjack drops a Rage spell on death that boosts all nearby troops. Deploy him slightly ahead of your main push (not behind). When defenders kill Lumberjack, his Rage spell accelerates your Golem, Night Witch, and Baby Dragon—overwhelming opponents before they can react.
Triple Elixir Strategy
In triple elixir challenges, Golem decks become unstoppable. Deploy Golem in both lanes simultaneously with full support. Opponents cannot defend two massive pushes at once. This dual-lane pressure guarantees tower destruction, often resulting in three-crown victories.
Common Golem Mistakes
Deploying Golem Too Early
The biggest mistake: deploying Golem in single elixir when behind or facing strong counter-push decks. Golem costs 8 elixir—leaving you with 2 elixir to defend their counter-attack. Wait until you have elixir advantage or it's double elixir time.
Overcommitting to Failed Pushes
When opponents successfully defend your first Golem push, new players dump another 10 elixir trying to force damage. This leaves you broke and defenseless. Accept the failed push, defend efficiently, and build your next push with full elixir.
Ignoring Opposite Lane Pressure
Focusing entirely on building one massive push while opponent destroys your opposite tower loses games. If opponent sends Hog Rider opposite lane while you build your Golem push, DEFEND first. Losing a tower just to build a push puts you in losing position.
Poor Lightning Timing
Using Lightning too early (before defenders spawn) or too late (after they damage Golem significantly) wastes its potential. Lightning when your Golem is 2-3 tiles from the tower and opponent has just placed their defenders. This maximizes Lightning value while preserving Golem health.
Upgrading Priority for Golem Decks
Card levels dramatically impact Golem deck performance. Prioritize upgrades in this order:
- Golem - Every level adds 200+ HP and stronger Golemites. Essential for surviving to tower.
- Lightning - Must kill same-level Inferno Towers and medium troops. Level-dependent interactions.
- Night Witch - Higher levels spawn stronger Bats and survive more interactions.
- Baby Dragon - Needs to survive Fireball and kill swarms efficiently.
- Zap - Level-dependent against Goblin Barrel and Princess.
- Tornado - Levels matter less, but higher levels deal chip tower damage.
- Mega Minion - Must survive Fireball and kill tanks. Level-critical.
- Lumberjack - DPS increases significantly with levels.
Golem Deck Success Checklist
- ✓ Lightning spell to counter Inferno Tower and grouped defenders
- ✓ Tornado for King Tower activation and defensive grouping
- ✓ Night Witch for spawner synergy behind Golem
- ✓ Splash damage troops (Baby Dragon) for swarm defense
- ✓ Tank killer (Mega Minion) for opponent's beatdown
- ✓ Deploy Golem behind King Tower, never at bridge
- ✓ Save massive pushes for double elixir time
- ✓ Defend efficiently in single elixir—don't overcommit
- ✓ Use Lightning on Inferno Tower before it melts Golem
- ✓ Place Night Witch directly behind Golem for protection
Conclusion: The Beatdown Juggernaut
Golem decks embody the essence of beatdown: overwhelming force that opponents cannot stop through conventional defense. Mastering Golem requires patience, strategic thinking, and understanding when to invest your massive elixir into game-ending pushes. Unlike faster decks that chip away gradually, Golem decks commit everything to unstoppable assaults that destroy towers in single pushes.
The learning curve for Golem is steep. New players struggle with elixir management, deploy Golem at wrong times, and get punished by aggressive counter-pushes. But once mastered, Golem decks provide immense satisfaction—watching your 25-elixir army march unstoppably toward the King Tower while opponents exhaust every defensive option feels incredible.
Start with the classic Golem Night Witch deck to learn fundamental beatdown mechanics. Practice defending efficiently in single elixir while building elixir advantage. Master Lightning timing to eliminate Inferno Towers and key defenders. As your skill improves, you'll develop instincts for when to push and when to defend—the critical judgment that separates good Golem players from unstoppable beatdown masters.
Remember: Golem decks dominate double elixir. Survive to 1:00 remaining with towers intact, then unleash hell. The Golem doesn't knock—he breaks down doors and destroys everything in his path. Master this deck, and you'll become the unstoppable force opponents fear to face.
Ready to Build Your Perfect Deck?
Use our AI-powered Deck Creator to generate optimized decks based on the strategies you just learned.