Sparky Deck Strategies 2025: High-Damage Destruction Guide
Master Sparky decks with devastating area damage. Complete guide to Giant Sparky, Goblin Giant synergy, reset protection, and dominating 2025 meta.
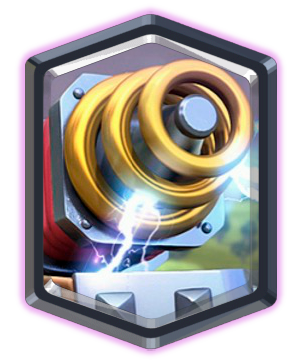
Sparky: The High-Risk, High-Reward Devastator
Sparky represents the ultimate high-risk, high-reward card in Clash Royale. Her devastating area damage blast obliterates entire pushes in single shots, one-shotting Wizards, Musketeers, and most troops. However, her slow charge time and vulnerability to resets make her one of the most challenging cards to master. When protected properly, Sparky creates unstoppable destruction waves that opponents cannot efficiently counter.
Mastering Sparky requires understanding her unique mechanics, protecting her from resets, and building synergistic decks that enable her devastating potential. Unlike straightforward win conditions, Sparky demands strategic thinking, prediction skills, and perfect support troop deployment. The reward for this complexity: explosive tower destruction and satisfying victories through superior strategy.
Why Sparky Dominates When Protected
Sparky maintains competitive viability through several unique strengths:
- ▸Massive area damage - 1,100+ damage blast that kills entire pushes instantly
- ▸One-shot potential - Eliminates Wizards, Witches, Electro Wizards, and most support troops
- ▸Defensive powerhouse - Destroys ground pushes when placed reactively
- ▸Counter-push conversion - Surviving defensive Sparky becomes devastating offensive threat
- ▸Tank synergy - Giant and Goblin Giant provide perfect protection for Sparky's charge
- ▸Zap bait potential - Combined with swarms, forces opponents into impossible spell choices
Sparky Statistics
- • Elixir Cost: 6
- • Charge Time: 4 seconds
- • Damage: 1,100+ (area damage)
- • Range: Medium
- • Movement Speed: Slow
- • Rarity: Legendary
- • Vulnerability: Reset by Zap, Electro Wizard, etc.
Giant Sparky: The Classic Combination
Giant Sparky represents the most popular and effective Sparky archetype. Giant's high health and building-targeting provides perfect protection while Sparky charges and devastates defenders.
Deck Composition
Primary tank
Win condition
Reset protection and defense
Zap bait and swarm
Spell bait and air swarm
Reset and small spell
Swarm clear and pushback
Air defense and tank killer
Average Elixir Cost: 3.8 - Balanced for consistent cycling
Core Strategy: Defensive Sparky to Offensive Devastation
Giant Sparky strategy revolves around using Sparky defensively first, then converting her into unstoppable counter-pushes. Your gameplan prioritizes surviving early game, defending with Sparky's massive damage, and building game-ending pushes in double elixir.
Phase 1: Early Game Defense (0:00 - 2:00)
Objective: Use Sparky defensively and scout opponent's resets
- • NEVER deploy Sparky offensively first minute—use defensively only
- • Place Sparky reactively against ground pushes to obliterate them
- • Identify opponent's reset cards (Zap, Electro Wizard, etc.)
- • Defend with swarms, Mega Minion, and Electro Wizard to save elixir
- • If Sparky survives defense, add Giant in front for counter-push
Phase 2: Mid Game Setup (2:00 - 1:00)
Objective: Build Giant Sparky pushes and test defenses
- • Deploy Giant behind King Tower when at 10 elixir
- • Add Sparky behind Giant as he walks forward
- • Deploy Electro Wizard behind Sparky to prevent opponent's Electro Wizard reset
- • Use swarms (Goblin Gang, Minion Horde) to bait Zap before push arrives
- • Note which reset cards opponent uses—prepare to bait them next push
Phase 3: Double Elixir Domination (1:00 - 0:00)
Objective: Continuous Giant Sparky pushes with spell bait support
- • Deploy Giant + Sparky + Electro Wizard pushes continuously
- • Bait Zap with Goblin Gang/Minion Horde before Sparky reaches tower
- • When Sparky locks onto tower with Giant tanking, she destroys it in 2-3 blasts
- • Defend their counter-pushes with minimal elixir using Sparky defensively
- • Overwhelm with constant pressure—don't give opponent time to recover
Protecting Sparky from Resets
Sparky's primary weakness is reset mechanics. Zap, Electro Wizard, Lightning, and Electro Dragon completely reset her charge, wasting 4 seconds. Master these protection techniques:
- Spell Bait Before Push: Deploy Goblin Gang or Minion Horde in separate lane before your Giant Sparky push. If opponent Zaps the swarm, Sparky is safe from Zap for 2-3 seconds.
- Electro Wizard Protection: Place Electro Wizard directly behind Sparky. When opponent deploys their Electro Wizard to reset Sparky, your Electro Wizard stuns theirs first, preventing the reset.
- Spacing Deployment: Deploy support troops spread out behind Sparky so Lightning cannot hit multiple troops. Force opponent to choose: Lightning Sparky or Lightning support troops.
- Prediction Zap: If opponent consistently Zaps Sparky at specific tile, predict and Zap their Zap placement location with swarms just before Sparky arrives. Advanced technique.
Pro Tip: Against opponents with multiple resets (Zap + Electro Wizard), bait both before pushing. Deploy Minion Horde to bait Zap, then Goblin Gang to bait Electro Wizard. Once both resets are used, immediately push with Giant Sparky—she'll be uncontested.
Goblin Giant Sparky: The Modern Variation
Goblin Giant provides built-in swarm distraction, making him synergize perfectly with Sparky:
Deck Composition
- Goblin Giant (6) - Tank with spear goblins
- Sparky (6) - Win condition
- Dark Prince (4) - Splash damage and charge
- Mega Minion (3) - Air defense
- Zap (2) - Small spell
- Snowball (2) - Knockback and slow
- Hunter (4) - Close-range DPS
- Fisherman (3) - Activation and pulls
Average Elixir: 3.8
Goblin Giant Synergy
Goblin Giant's death spawns two Spear Goblins that distract troops threatening Sparky. When Goblin Giant dies tanking for Sparky, the Spear Goblins continue distracting defenders while Sparky blasts the tower. This built-in distraction makes Goblin Giant superior to regular Giant in some matchups.
Additionally, Goblin Giant's Spear Goblins bait out small spells. Opponents must decide: use Zap on Spear Goblins (freeing Sparky) or ignore them and let them chip 200+ tower damage. Either choice favors you.
Sparky Defensive Mastery
Sparky excels defensively, often creating larger value than offensive deployments. Master these defensive placements:
Against Ground Beatdown
When opponent deploys Golem, Giant, or Royal Giant, place Sparky in center of your side (4-5 tiles from river). She'll charge and blast the tank plus all support troops behind it. A single Sparky blast can destroy 10+ elixir of troops—massive defensive value. The tank survives but their support dies instantly.
Against Bridge Spam
Place Sparky reactively when Battle Ram, Bandit, or other spam crosses bridge. Her blast obliterates the spam before it reaches your tower. This 6-for-3 or 6-for-4 elixir trade builds massive elixir advantages.
Against Graveyard
Position Sparky next to your tower when opponent deploys Graveyard. Her area damage blast kills all spawning Skeletons instantly, completely shutting down the spell. Graveyard players hate facing Sparky because their 5-elixir spell becomes worthless.
Converting Defense to Offense
The key to Sparky mastery: every defensive Sparky becomes a counter-push. After Sparky blasts their push, immediately deploy Giant in front of her. She's already charged, positioned aggressively, and ready to blast the tower. This defensive-to-offensive conversion creates unstoppable momentum.
Matchup Guide: Winning and Difficult Matchups
Favorable Matchups
Graveyard Decks
Win Rate: 80-90%
Sparky hard-counters Graveyard completely. Her area damage blast kills all spawning Skeletons, making their primary win condition useless.
Strategy: Save Sparky for Graveyard. Place her next to your tower when they cast it. She clears the entire Graveyard instantly. Push aggressively with Giant Sparky—they lack effective counters. This matchup is nearly unlosable.
Heavy Beatdown (Golem, Giant)
Win Rate: 65-75%
Beatdown decks invest heavily in slow pushes that group troops together—perfect targets for Sparky's area damage.
Strategy: Defend their beatdown push with Sparky in center. She blasts their support troops (Night Witch, Baby Dragon, etc.) while tank survives. Use Mega Minion to finish tank. Counter-push with Giant Sparky—they lack elixir to defend properly.
Difficult Matchups
Rocket Cycle Decks
Win Rate: 25-35%
Rocket completely destroys Sparky for neutral trade (6 for 6). Combined with cycle cards, they Rocket every Sparky while outcycling you.
Strategy: This is your hardest matchup. Spread your pushes over time—force them to choose between Rocketing Sparky or Rocketing your tower. Use Sparky defensively to destroy their troops. Build massive elixir advantages through defense. Consider playing for draw if they have tower health lead.
Air Decks (Lava Hound, Balloon)
Win Rate: 30-40%
Sparky only targets ground troops. Air decks completely ignore her, making your 6-elixir win condition useless offensively.
Strategy: Rely on Mega Minion, Minion Horde, and Electro Wizard for air defense. Use Sparky only defensively against their ground support. Push opposite lane when they commit to air push. This matchup tests your air defense skills—not your Sparky mastery.
Even Matchups
Hog Cycle, Bridge Spam, Other Sparky Decks: These matchups depend on bait execution, reset timing, and defensive precision. Player skill determines outcomes.
Advanced Sparky Techniques
Double Bait Sequencing
Against opponents with Zap + Electro Wizard, execute double bait before pushing:
- Deploy Minion Horde in one lane—opponent Zaps
- Immediately deploy Goblin Gang opposite lane—opponent uses Electro Wizard
- With both resets used, push Giant + Sparky down middle—uncontested
- Sparky reaches tower and blasts it before opponent can cycle to resets
This advanced sequencing requires precise timing and elixir management but guarantees Sparky connects when executed perfectly.
Prediction Sparky Placement
Against predictable opponents who always defend same location, place Sparky preemptively. If they always place Wizard behind King Tower to defend your push, place Sparky targeting that tile before your Giant arrives. She'll blast their Wizard as they deploy him—devastating prediction.
Sparky + Dark Prince Synergy
Dark Prince's shield protects him from one hit, making him excellent Sparky support. His charge clears swarms that would surround Sparky. Deploy Dark Prince ahead of Sparky to clear Skeleton Army, Goblin Gang, and other swarms—enabling Sparky to focus on towers.
Ice Golem Kiting for Sparky
When defending with Sparky, use Ice Golem to kite dangerous troops (Mini P.E.K.K.A, Prince) into Sparky's blast radius. Ice Golem pulls them, groups them together, and Sparky obliterates them in one shot. This 2-elixir + 6-elixir combo (8 total) can defend 10-12 elixir pushes.
Common Sparky Mistakes
Deploying Sparky Into Resets
The most common mistake: pushing with Sparky when opponent has Zap or Electro Wizard ready. Always bait resets before committing Sparky to offense. Track opponent's card cycle religiously. If their Zap is in rotation, don't push until you bait it.
Overcommitting to Failed Pushes
When opponent resets Sparky and kills her, new players dump more elixir trying to salvage the push. Accept the failed push, defend efficiently, and cycle to next Sparky. Overcommitting after Sparky dies leaves you defenseless against counter-attacks.
Ignoring Defensive Sparky
Some players only use Sparky offensively, wasting her defensive potential. Sparky creates more value defensively (destroying 10+ elixir pushes for 6 elixir) than offensively (often getting reset and providing zero value). Prioritize defensive Sparky, then convert to offense.
Poor Spacing Behind Tank
Placing support troops too close to Sparky enables Lightning to hit multiple troops. Space Electro Wizard, Mega Minion, and other support 3-4 tiles apart. Force opponent to choose one Lightning target, not three.
Upgrading Priority for Sparky Decks
Card levels critically impact Sparky performance. Upgrade priority:
- Sparky - Damage per blast increases significantly. Must one-shot medium troops at equal levels.
- Giant/Goblin Giant - More HP means Sparky gets more shots before tank dies.
- Zap - Level-dependent against Goblin Barrel and swarms. Essential utility.
- Electro Wizard - Legendary upgrades are slow but improve defensive value.
- Mega Minion - Must survive Fireball and kill tanks. Level-critical.
- The Log - Kills higher-level Princess and Dart Goblin. Legendary = slow.
- Goblin Gang - Higher levels survive more interactions for better bait.
- Minion Horde - Survives Zap at higher levels, crucial for bait strategy.
Sparky Deck Success Checklist
- ✓ Tank (Giant/Goblin Giant) to protect Sparky
- ✓ Reset protection (Electro Wizard or spell bait)
- ✓ Spell bait cards (Goblin Gang, Minion Horde)
- ✓ Air defense troops (Mega Minion minimum)
- ✓ Small spell (Zap/The Log) for swarms
- ✓ Use Sparky defensively first, offense second
- ✓ Bait resets before pushing with Sparky
- ✓ Track opponent's reset cards in cycle
- ✓ Convert defensive Sparky to counter-pushes
- ✓ Space support troops to avoid Lightning value
Conclusion: Mastering Controlled Chaos
Sparky decks reward players who master prediction, bait mechanics, and strategic thinking. The explosive satisfaction of Sparky's blast obliterating entire pushes makes every successful play feel incredible. Unlike consistent chip damage win conditions, Sparky creates dramatic, game-changing moments where single blasts determine victory or defeat.
The learning curve is challenging. New Sparky players struggle with reset timing, waste her on failed pushes, and get frustrated by Zap spam. But persistence develops instincts for tracking opponent's cards, executing double bait sequences, and knowing precisely when Sparky is safe to deploy offensively. These skills transform Sparky from liability into unstoppable force.
Start with Giant Sparky to learn fundamental protection mechanics. Practice defensive Sparky placements until they become instinctive. Master spell bait sequencing to guarantee offensive Sparky reaches towers. As your game sense develops, you'll anticipate opponent's resets and counter them before they happen—the hallmark of elite Sparky mastery.
Remember: Sparky is not a straightforward win condition you deploy every cycle. She's a strategic weapon requiring perfect timing, setup, and protection. The reward for this complexity: devastating blasts that destroy towers in 2-3 shots, opponents panicking as Sparky locks onto their King Tower, and the satisfying knowledge that you outplayed them through superior strategy. Master Sparky, and you'll command one of Clash Royale's most feared and respected win conditions.
Ready to Build Your Perfect Deck?
Use our AI-powered Deck Creator to generate optimized decks based on the strategies you just learned.